This is a complete step by step guide to install MongoDB on Windows.
Install MongoDB on Windows
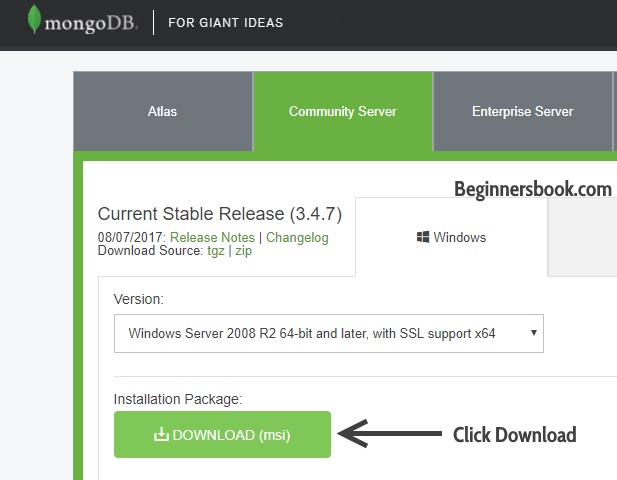
Step 1: Go to MongoDB download Page and click download as shown in the screenshot. A .msi file like this mongodb-win32-x86_64-2008plus-ssl-3.4.7-signed will be downloaded in your system. Double click on the file to run the installer.
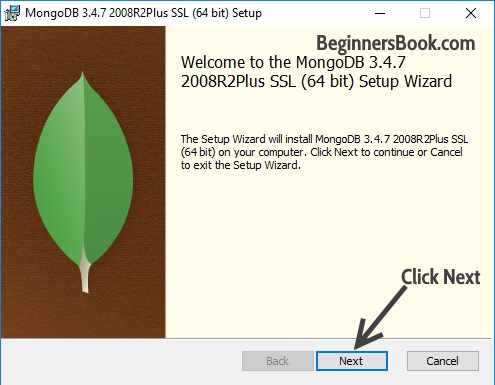
Step 2: Click Next when the MongoDB installation windows pops up.
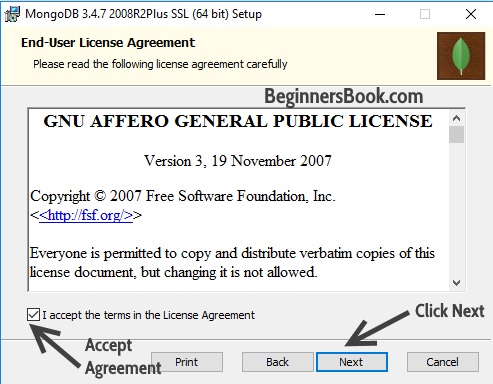
Step 3: Accept the MongoDB user Agreement and click Next.
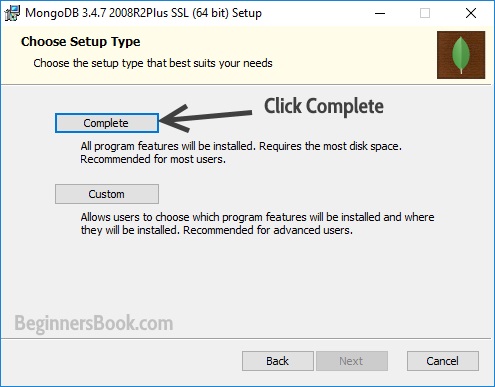
Step 4: When the setup asks you to choose the Setup type, choose Complete.
Step 5: Click Install to begin the installation.

Step 6: That’s it. Click Finish once the MongoDB installation is complete.
We are not done here. There are couple of steps we need to do before we can start using MongoDB.
MongoDB Configuration
Step 1: Locate the folder where you have installed MongoDB. If you have followed the above steps then you can find the folder at this location:
C:\Program Files\MongoDB
Here you need to create couple of folders that we need for MongoDB configuration.
1. Create two folders here, name them data and log.
2. Create another folder inside data and name it as db, that’s where all the data will be stored.
That’s it close the window.
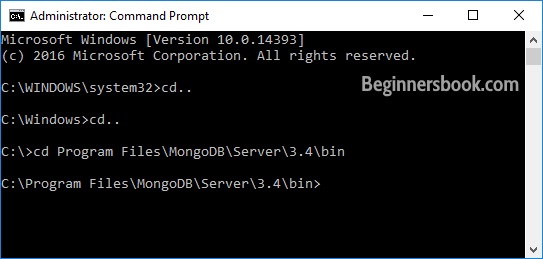
Step 2: Open command prompt (right click and run as administrator). Navigate to the bin folder of MongoDB as shown in the screenshot. The path to the bin folder may be different in your case based on where you have installed the MongoDB.
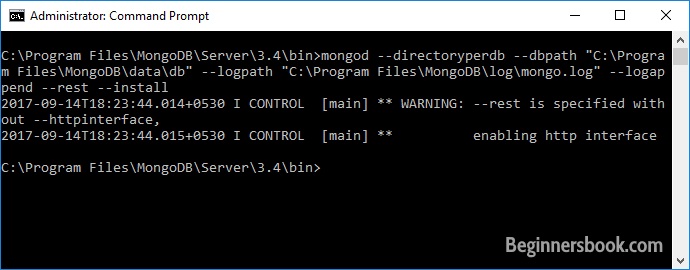
Step 3: Configure the data & log folder and set MongoDB as service by typing this command. Note: This is a one line command.
mongod --directoryperdb --dbpath "C:\Program Files\MongoDB\data\db"
--logpath "C:\Program Files\MongoDB\log\mongo.log" --logappend --rest --install
Step 4: Now you can start MongoDB as a service by typing this command:
net start MongoDB
You should see a message “MongoDB service was started successfully”.

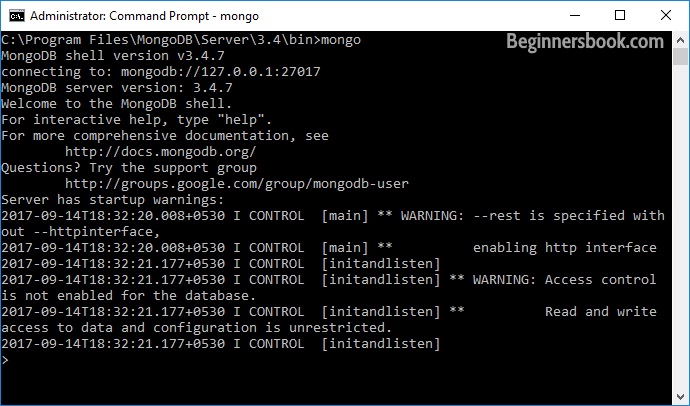
That’s it everything is done. Now we should be working in the MongoDB shell and we can run that by typing this command within the bin directory.
mongo
In the next tutorials we will learn how to work in the MongoDB shell.
If you want to exit the shell, you can do that by typing quit() or use Ctrl-C and then you can stop the MongoDB service with this command:
net stop MongoDB
Leave a Reply