This is a complete guide for installing Eclipse, setting up apache tomcat server and running your first hello world servlet application.
Download Eclipse IDE
Install Eclipse on Windows
Go to this link https://www.eclipse.org/downloads. Under “Get Eclipse Oxygen” ❯ Click “Download Packages”❯ Download “Eclipse IDE for Java Developers”. You would see two options on the right side (32 bit and 64 bit), click on 32 bit if you system is 32 bit else click on 64 bit. This will download a zipped file on your system.
To install Eclipse, unzip the downloaded file and copy the unzipped folder to the desired location.
Install Eclipse on Mac OS X
Go to this link https://www.eclipse.org/downloads. Under “Get Eclipse Oxygen” ❯ Click “Download Packages”❯ Download “Eclipse IDE for Java Developers”. To download click on 64 bit and it would download a TAR file.
Once download is finished double click on the TAR file, it would extract the contents of the file to a folder. Drag the folder to “Applications” folder.
To launch the Eclipse, click on Eclipse icon in the Eclipse folder. Mac users can drag this to the dock area to quickly launch Eclipse from desktop, similarly Windows can create a shortcut of Eclipse on desktop.
Installing and configuring Apache tomcat server in Eclipse
In order to run Servlet in Eclipse IDE, you need to have Apache tomcat Server configured in Eclipse IDE.
If you don’t have it then refer this tutorial: How to download and configure Apache Tomcat Server in Eclipse IDE.
Note: The link I have provided above belongs to JSP tutorials but the steps are same for Servlets as well.
Creating Servlet in Eclipse IDE
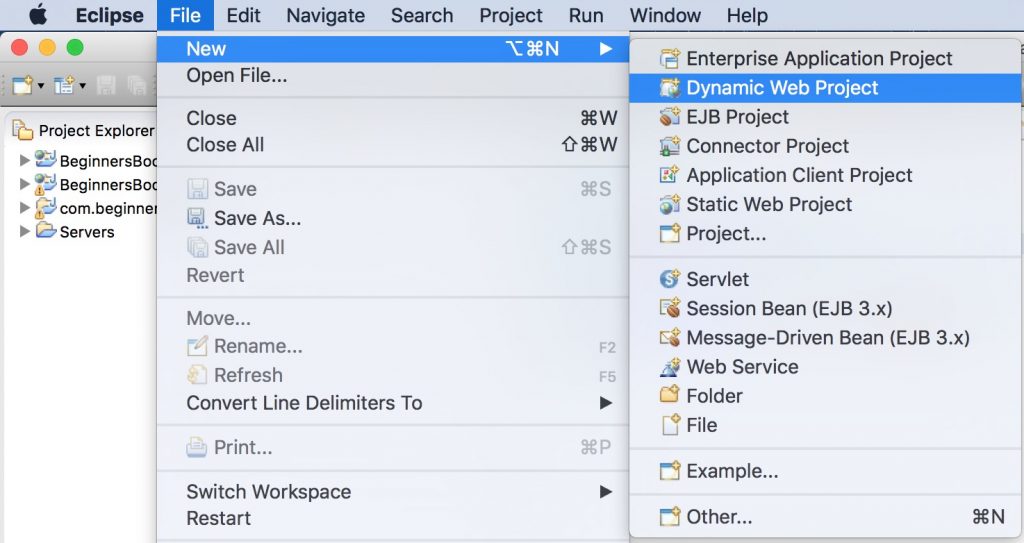
Step 1: Create a Project:
Lets create a Servlet application in Eclipse. Open Eclipse and then click File ❯ New ❯ Click Dynamic Web Project.
If you do not see dynamic web project option in Eclipse then refer this tutorial: How to fix “Dynamic Web project” missing in Eclipse issue
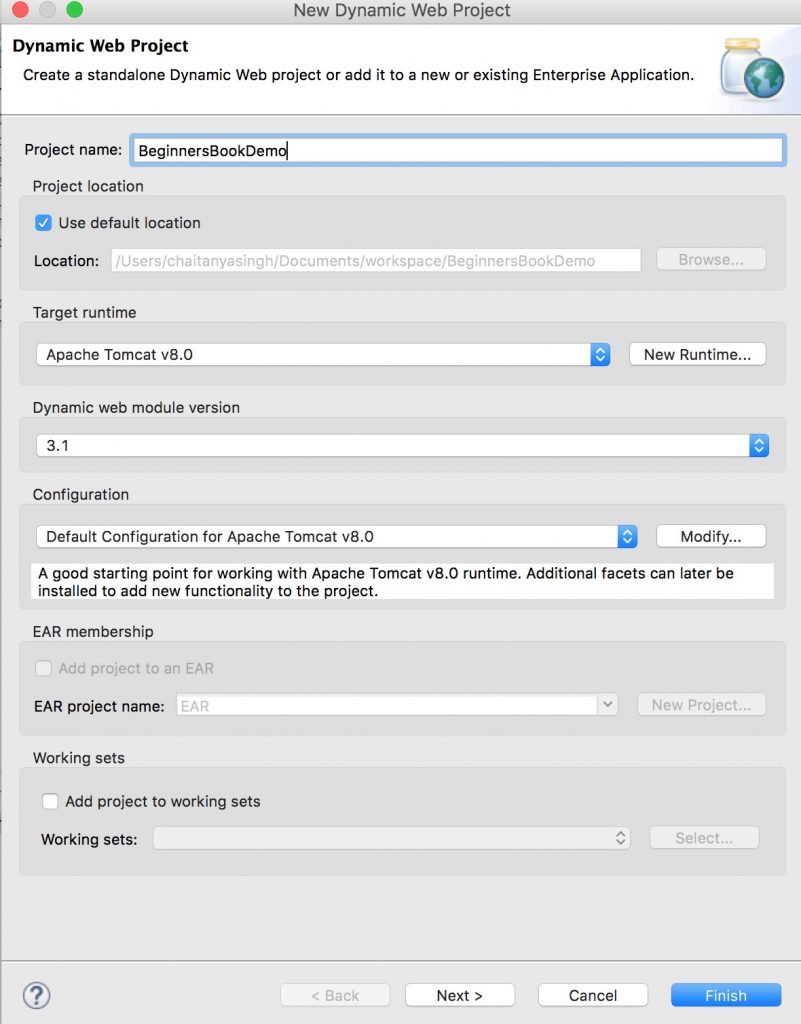
Give Project name and click Next.
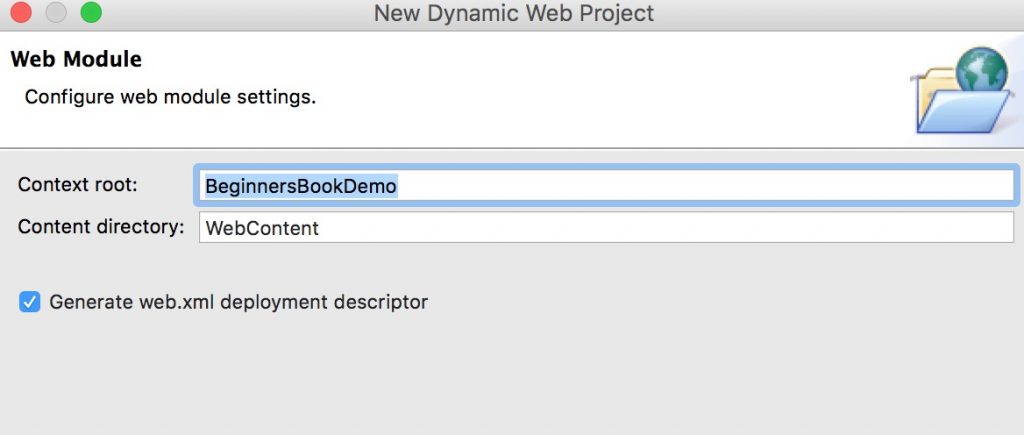
Tick the checkbox that says Generate web.xml deployment descriptor
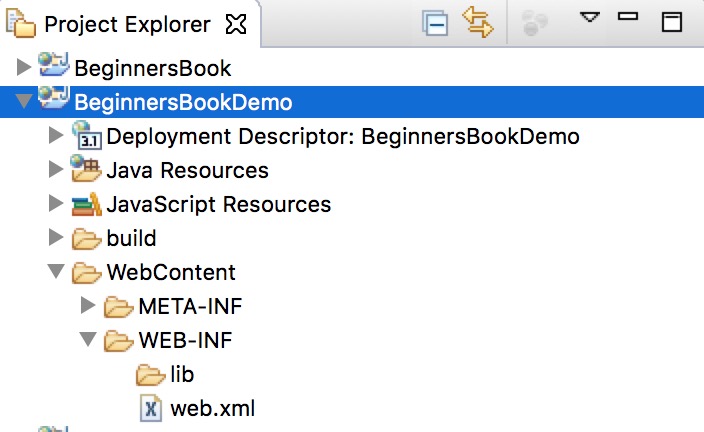
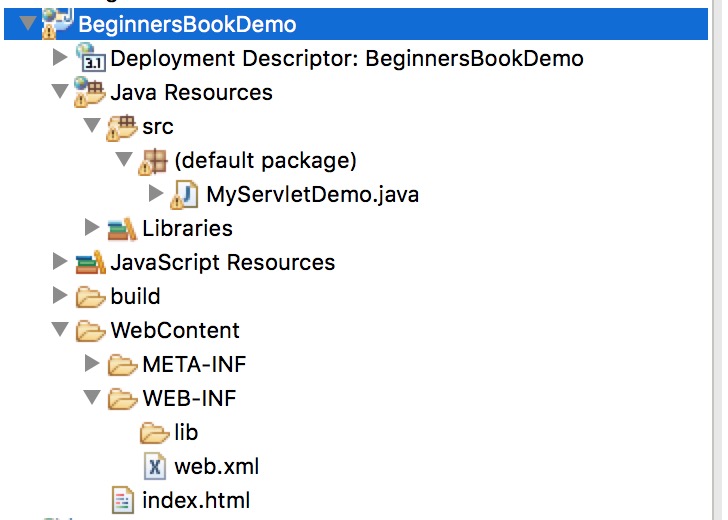
Initial Project structure:
Upon creation of project, the hierarchy (project structure) would look like this:
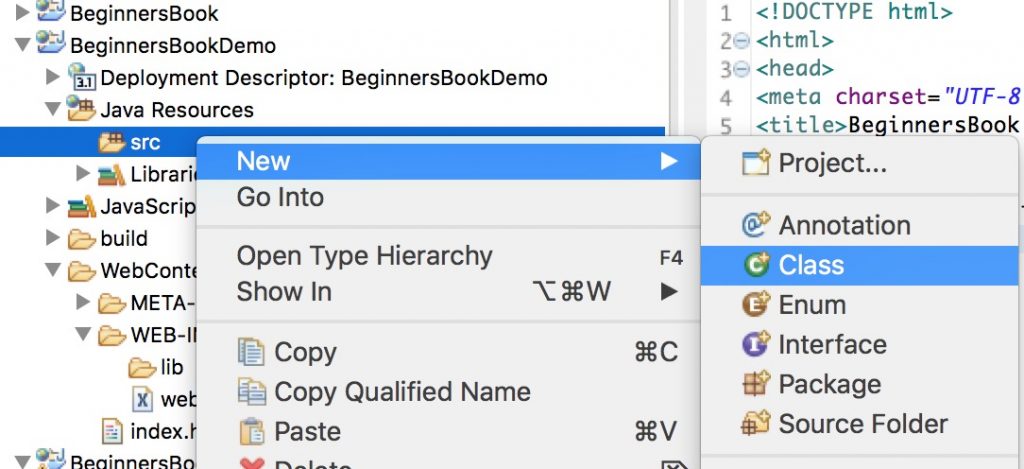
Step 2: Create a Servlet class:
We are creating a Http Servlet by extending HttpServlet class. Right click on the src folder and create a new class file, name the file as MyServletDemo. The file path should look like this: Java Resources/src/default package/MyServletDemo.java
MyServletDemo.java
import java.io.*;
import javax.servlet.*;
import javax.servlet.http.*;

// Extend HttpServlet class to create Http Servlet
public class MyServletDemo extends HttpServlet {

   private String mymsg;

   public void init() throws ServletException {
      mymsg = "Hello World!";
   }

   public void doGet(HttpServletRequest request,
      HttpServletResponse response)
      throws ServletException, IOException
   {

      // Setting up the content type of webpage
      response.setContentType("text/html");

      // Writing message to the web page
      PrintWriter out = response.getWriter();
      out.println("<h1>" + mymsg + "</h1>");
   }

   public void destroy() {
      /* leaving empty for now this can be
       * used when we want to do something at the end
       * of Servlet life cycle
       */
   }
}
Step 3: Create an html page to call the servlet class on a webpage
We are creating an html file that would call the servlet once we click on the link on web page. Create this file in WebContent folder. The path of the file should look like this: WebContent/index.html
index.html
<!DOCTYPE html>
<html>
<head>
<meta charset="UTF-8">
<title>BeginnersBook Servlet Demo</title>
</head>
<body>
<a href="welcome">Click to call Servlet</a>
</body>
</html>
Edit web.xml file
This file can be found at this path WebContent/WEB-INF/web.xml. In this file we will map the Servlet with the specific URL. Since we are calling welcome page upon clicking the link on index.html page so we are mapping the welcome page to the Servlet class we created above.
<web-app>
<display-name>BeginnersBookDemo</display-name>
<welcome-file-list>
<welcome-file>index.html</welcome-file>
<welcome-file>index.htm</welcome-file>
<welcome-file>index.jsp</welcome-file>
<welcome-file>default.html</welcome-file>
<welcome-file>default.htm</welcome-file>
<welcome-file>default.jsp</welcome-file>
</welcome-file-list>

<servlet>
<servlet-name>MyHttpServletDemo</servlet-name>
<servlet-class>MyServletDemo</servlet-class>
</servlet>

<servlet-mapping>
<servlet-name>MyHttpServletDemo</servlet-name>
<url-pattern>/welcome</url-pattern>
</servlet-mapping>

</web-app>
Final Project Structure
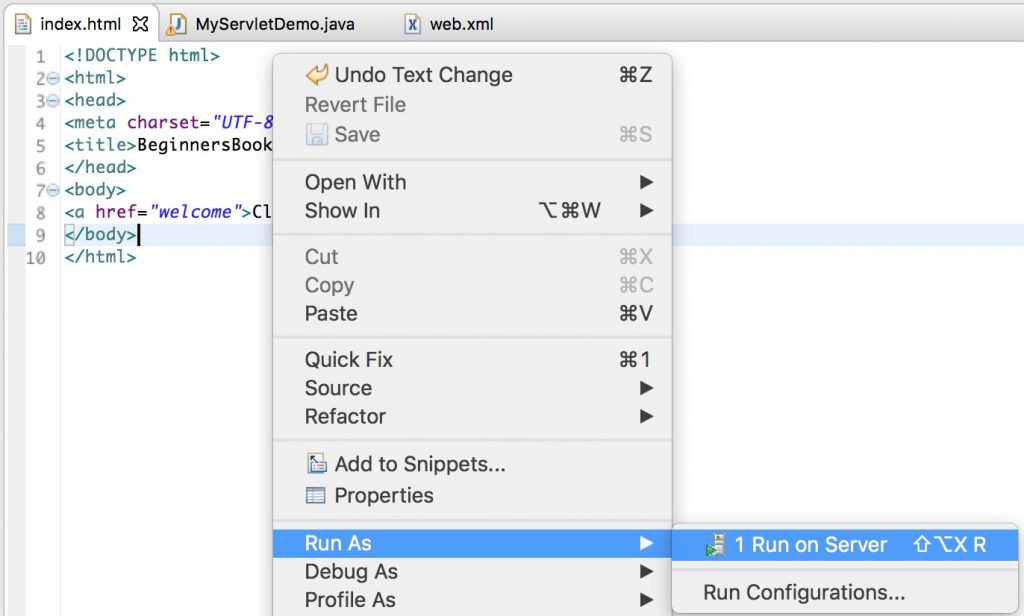
Run the project:
Right click on the index.html, run on server.
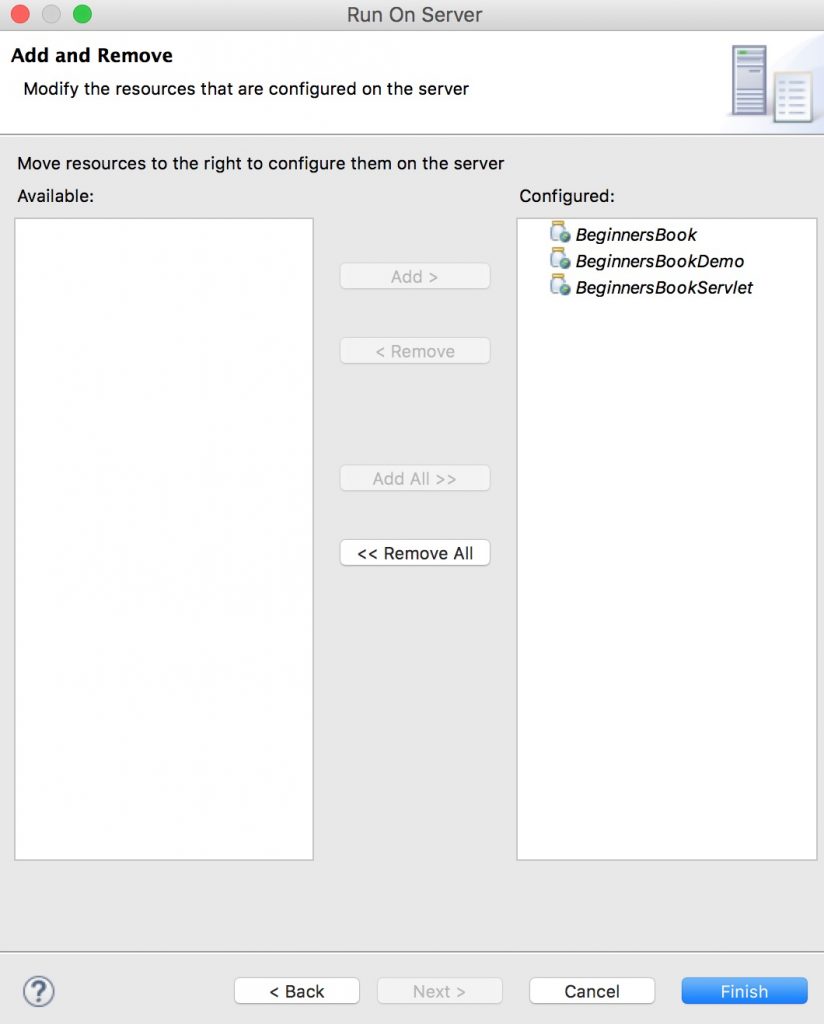
Click Add All to deploy the Project on Server. Click Finish
Output:

Upon clicking the link you would get this screen:

Leave a Reply