In the previous tutorial we have seen how to create and run your first Kotlin Project in Eclipse IDE. In this guide, we will see how to install IntelliJ IDEA which is an IDE by JetBrains, the same company that developed Kotlin programming language. We will also see how to create and run your first Kotlin project in IntelliJ IDEA.
IntelliJ IDEA Installation
Go to the download page of official Jetbrains website. Choose the Operating System and download the community edition.

Creating your First Kotlin Project in IntelliJ IDEA IDE
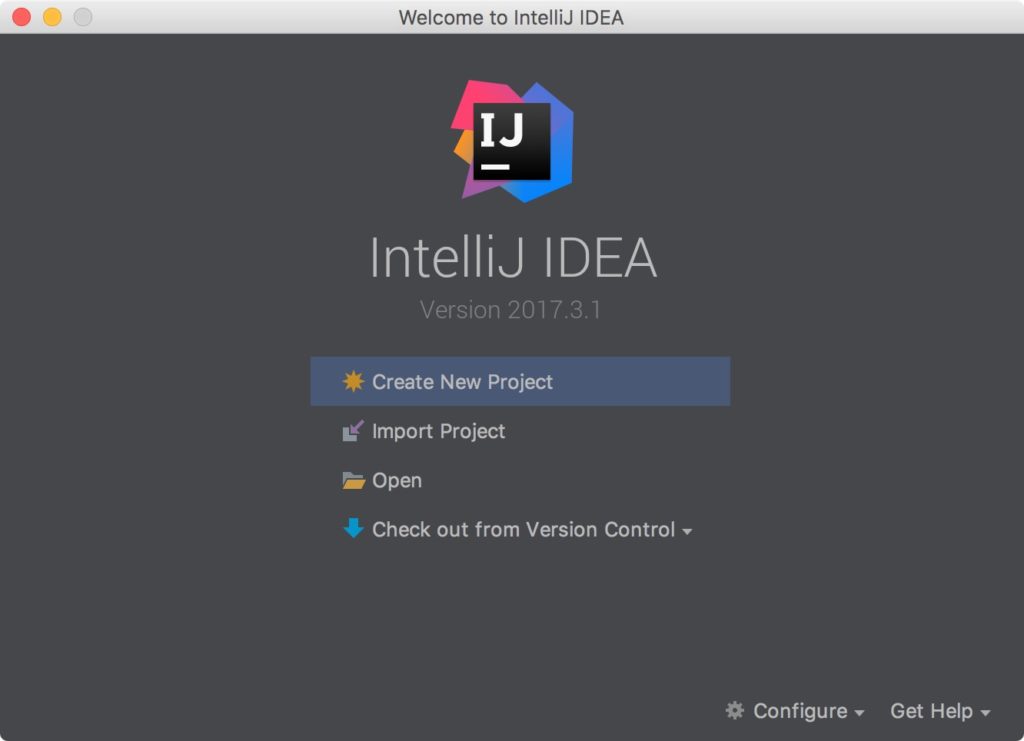
Step 1: Select “Create New Project”.

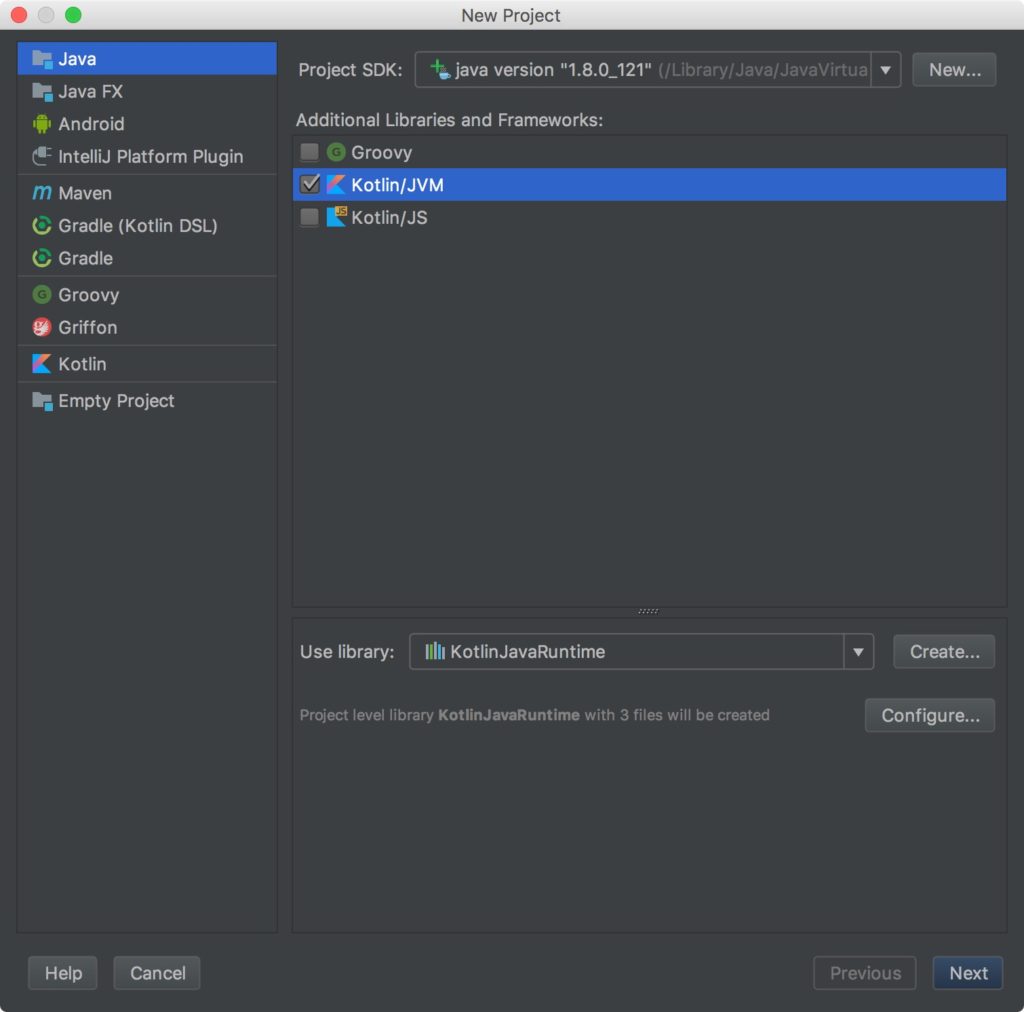
Step 2: In “Additional Libraries and Frameworks” section, select Kotlin/JVM and click “Next”.

Step 3: Give the Project Name and click “Finish”.

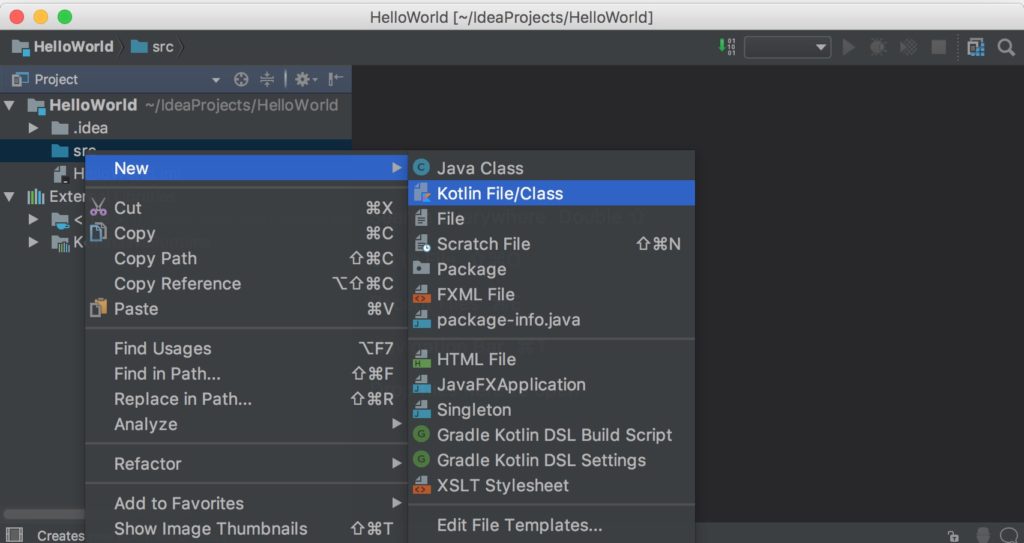
Step 4: Create a new Kotlin File in “src” folder of Kotlin Project.

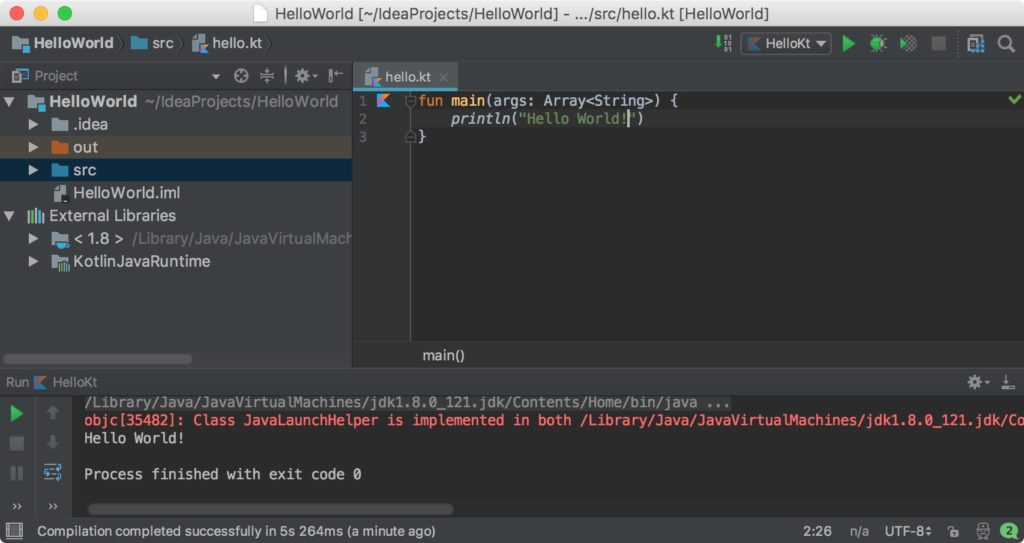
Step 5: Type the code
Step 6: To run the Kotlin file, click the Kotlin Icon located at the left side as shown in the screenshot below. Select Run ‘HelloKt’ to run the file.

Step 7: If everything went fine, you should see the output of the program at the bottom of the screen.

Leave a Reply