In this tutorial we will see how to install Kotlin plugin in Eclipse IDE to create and run your first Kotlin application in Eclipse IDE.
Installing Kotlin Plugin
Step 1: If you have not installed Eclipse IDE, you can download it from this link: https://www.eclipse.org/downloads/ Be sure to grab the “Eclipse IDE for Java Developers” bundle. To run the Kotlin in Eclipse IDE, you must have the Eclipse Neon or later version of the IDE. I m using Elipse Oxygen.
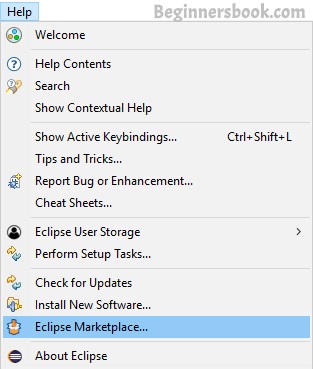
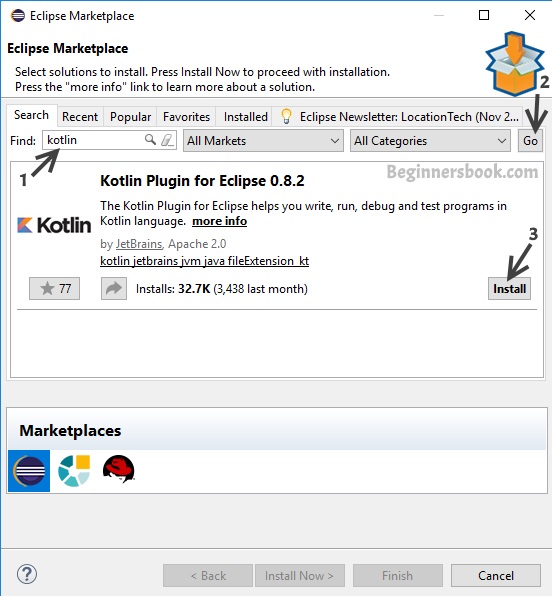
Step 2: To install Kotlin plugin in Eclipse, go to Help section in Eclipse IDE menu and click on “Eclipse Marketplace”. Search for kotlin plugin by typing “Kotlin” in the search field and click go. Click install to install the Kotlin plugin as shown in the screenshot below.


Step 3: Once installation is done, accept the agreement and click “Finish”.
Open Kotlin Perspective in Eclipse IDE
Open the Perspective window in Eclipse IDE by clicking the icon shown in the screenshot below. You can find this icon in the top right corner of Eclipse IDE. Alternatively you can open Perspective window from menu Window -> Open Perspective -> Other.
Select Kotlin and click Open.

Creating First Kotlin Project in Eclipse
File -> New -> Kotlin Project. Give project name and click finish.

Creating Project File in Kotlin Project
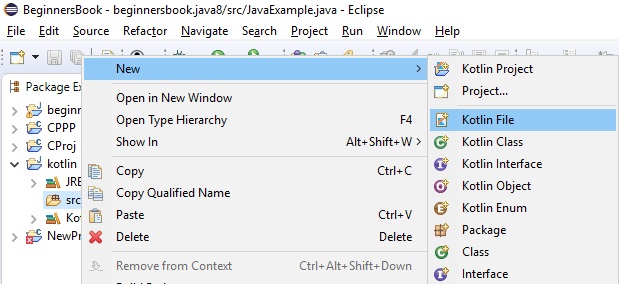
Project->right click on src->New->Kotlin File. Give a meaningful file name and click finish. Kotlin files have .kt extension.

Type this code in the file:
fun main(args : Array) {
    println("Hello, World!")
}
Running the first Program
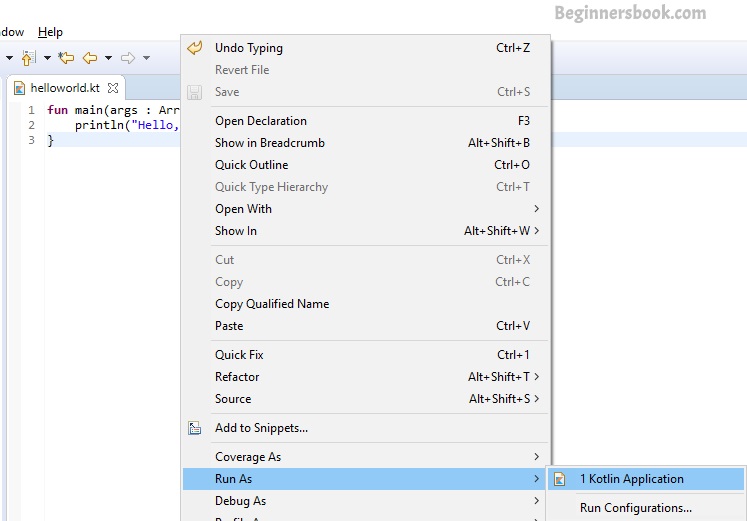
Right click on the file ->Run As->Kotlin Application

Output:

Leave a Reply